Chamomile Flowers

How we Grow Chamomile Flowers

Chamomile due to its tremendous benefits has gained a lot of popularity world-wide. Its medicinal properties with a nice taste and apple like fragrance is amazing. Its consumption as a Herbal Tea is becoming very popular.
Himalayas are very-well known for its herbal produce since ancient times.
With this guideline we will be sharing the step by step guide of producing and harvesting chamomile flowers.

I had no earlier experience of growing chamomile other than my knowledge to operate computer and perform google search. I collected all the information required to plant chamomile either at small scale or large scale chamomile productions.

I was lucky to have this bare land of my father to go for this trial. Now, with great confidence I initially bought 40 packets of seeds and did the seed plantation to seed beds. Turned out, nothing popped up, not even a single tiny chamomile seedling. I kept searching for the plants among the weeds which was now populated in all over my seed beds. I didn’t even know how the seedling is going to look like.

Honestly, this was a total failure with a great message learnt. Farming without any practical exposure can’t lead to a good crop even if you are good at google search.

After this message learnt I kept idle for a while, I mean I did not try it again months went passed.
One day, I decided to share this failure to my Father, my father is an experienced farmer who has been into farming for almost 50 years. 

He asked couple of questions about my trial and said. You need to learn through experiment, rather than execution. Just get 2 packets of chamomile seeds, not more than that.

I will help you with the process of plantation and to go with cultivation at large scale, further. Despite the fact that he didn’t grow chamomile flowers before, I agreed to him and proceeded as per his instructions.

Turned out, it worked very well and these days we are able to produce chamomile at large scale in tons. 

Let me reveal this knowledge in a step by step process, so that you don’t loose your money, time and patience.
We will be sharing the actual practice which we went through. Also, we will be adding the photographs or videos which we captured during its cultivation.

Here we go…
STEP 1 : Right season of weather, time or temperature to perform chamomile sowing.

Chamomile Requirement Chart

Chamomile is a yearly crop which means it can be cultivated in any season through out the year except frost. If you live in a place where frost doesn’t come during winters, you can go ahead with chamomile flower cultivation in any time during the year. We live in Himalayas where we have winter season starting from the month of November to February. In this frame we get exposed to heavy frost between December to February mid. This is the time when we don’t propose anyone the cultivation of chamomile flowers in an open farm or field.

Just after the frost or when the frost is not very heavy in the month of February, you need to start preparing for the seed beds or you can also start the sowing indoor. In this guide we will explain the process of outdoor cultivation.

Temperature Requirement : Before you start your process, you need to make sure the environment or the weather you live is suitable as per the chamomile plantation requirements as attached in the table above. 

STEP 2 : Preparation of chamomile seed beds.

Choose location with a full of sun-light for your seed bed. Moist land with sun light helps in germination of seeds quickly.

Chamomile Seed bed preparation by loosing the soil and removing all the weeds.

Adding mixture of organic manure into soil.

Creating bed type shape above 1.5 ft from ground.

My friend goes back into soil to maintain the softness of soil.

Sooth the land and add any organic fertilizer into it, preferred cow dung. You need to mix mud with cow dung properly. Try to create flat bed type shape for your mixture. Keep the height of bed at least 1.5 feet from the ground. It needs to have this much height to avoid rain water flooding into your chamomile seed bed.

STEP 3 : Sowing the Chamomile Seeds

Once your seed bed is ready, perform the chamomile sowing into your seed bed. These seeds are too tiny, sow them evenly and than cover with fine soil, 1/4 inches.
Sprinkle water slowly all over the seed bed and cover with dry leaves. This way it is going to maintain the moisture label for easy seed germination.
Keep checking the moisture label every alternate day. Water as soon as you find it dry.
Sowing Chamomile Seeds

Covering seeds with soil.

Sprinkling water softly after chamomile seed plantation.

Himalayan cedar natural dry leaves used to protect the chamomile seed beds during its initial one week.

STEP 4 : Safeguard chamomile seedlings against bad weather.

In a week or so you should observe seed germination and tiny little chamomile seedlings in your bed.
Now, remove all the dry leaves from your seed bed which you used earlier to keep the moisture label. Delay in clearing the dry leaves can affect your soft seedlings and can lead to harm or permanent damage.

Create roof for your seed bed, at least 2 feet above the ground. We use pruned plum sticks to create that roof. They are elastic in nature, so can easily be turned into round shape. Doesn’t matter what you use to cover your seed bed, just make sure the seedlings can be protected against heavy rain or during bad weather.

We are attaching some of the photos and video from our farm.

This plant is used as a wonderful ancient thread to tie up things.

Safeguarding your chamomile seed bed from animals

Play Video

Creating roof for the bed using elastic pruned,  plum sticks

Safeguarding Chamomile Seedlings against bad weather
Play Video

Using polythene to cover the seedlings during night or heavy rain fall.

Chamomile starts to grow rapidly. 

Let me share my experience of this incredible fragrance coming from the plants with the wind flow. It use to have a surprising touch with its aromatic fragrance. No doubt, I am a big fan of chamomile. 

Please observe the pictures attached below where I have added dates and the days for you to better make a comparison with your production. The result which you observe might not be exactly same as it is attached. The growth of chamomile might vary to some extent depending upon the factors such as climate, temperature the month of plantation etc..

Chamomile is germinating out of seed bed

Grown up chamomile seedlings.

Chamomile Seedlings
Play Video

Growing fast, cute little chamomile seedlings.

Enjoying the dew drops, 21 days old Chamomile Seedlings

Play Video

Chamomile plants are ready to be shipped to the farm land. Don’t miss the background song of beautiful birds singing in this video.

STEP 5 : Chamomile Seedlings are ready to rock in the farm, pot or area you seek for its cultivation.

Now, its day 36 when Chamomile Plants are ready to make this move from seed bed to the area where you seek its cultivation. Chamomile can be planted into your flower pot, house backyard or the farm you seek for its growth.

Before you pull out the seedlings from your seed bed, make sure the soil is soft. Don’t force to pull, that way you can break the roots of the plant and chamomile seedling may not survive the transplant. To soften the soil, sprinkle enough water into your seed bed and let the soil soak it completely.

Chamomile Transplant FAQ

  • How to make sure that the chamomile plants are ready to make a move?

    1. Transplant only after the danger of winter frost is over. 2. The plants are grown to the height 4 inches or more.

  • How deep the roots of chamomile plant should be kept?

    Make holes in the soil double the size of root balls. Once the plant is moved in the hole, fill it up with soil mixture.

  • How far should I plant or the ideal gap required between chamomile plants ?

    You can keep the distance between two plants around 8 to 10 inches.

  • Do I need to water immediately after transplant?

    It is better to water the soil before the transplant because that way you will make sure the roots are not coming out with the water flow or pressure.

  • How much water is required after chamomile plant transplant?

    Frequent watering is required for young chamomile plants. Water plants once on every alternate day, unless you see chamomile flowers growing on the plants. Make sure you don't over water the soil, it needs to be just moist.

    • Ideal way of watering is by checking the soil, provide water if you find the soil dry. You may reduce the watering during rain.
    • Once the chamomile plants are established you may reduce the watering. Chamomile is a hard plant, once grown you can reduce the watering to once a week or two.

  • How to make sure if you are getting enough nutrients for your chamomile plants?

    During this entire chamomile production cycle, you may need to check for the external weeds appearing in your farm. These external weeds can steal the nutrients of your plant. Make sure you regularly remove these weeds. You must add organic manure preferred cow dung into the soil twice or thrice during this entire cycle. Also, while adding the manure, you need to loosen the soil and mix it properly between plants.

  • Chamomile seedling rocking in the farm
    Play Video

    My first Chamomile Plant has been moved from seed bed to the larger space for its cultivation.

    Day 36 Chamomile Transplant
    Play Video

    Water is must during the movement of the chamomile seedlings.

    Chamomile Flower Bud
    Play Video

    It is an incredible experience to see the first chamomile flower coming out. Again don’t miss the natural background music.

    My First Chamomile Flower

    It’s there, nice and happy.

    Dew Drops on Chamomile Flower buds
    Play Video

    So many beautiful chamomile flowers, Day 86.

    STEP 6 : Ready with the production, harvesting of chamomile flowers

    Almost 3 months now, such a nice crop with beautiful chamomile flowers. You can also recognize the harvesting time when you see the guests appearing on the chamomile flower buds enjoying. By guests I mean the natural pollinizer experts such as honey bee, butterflies, etc.. I have tried to capture few of them in the video attached below.

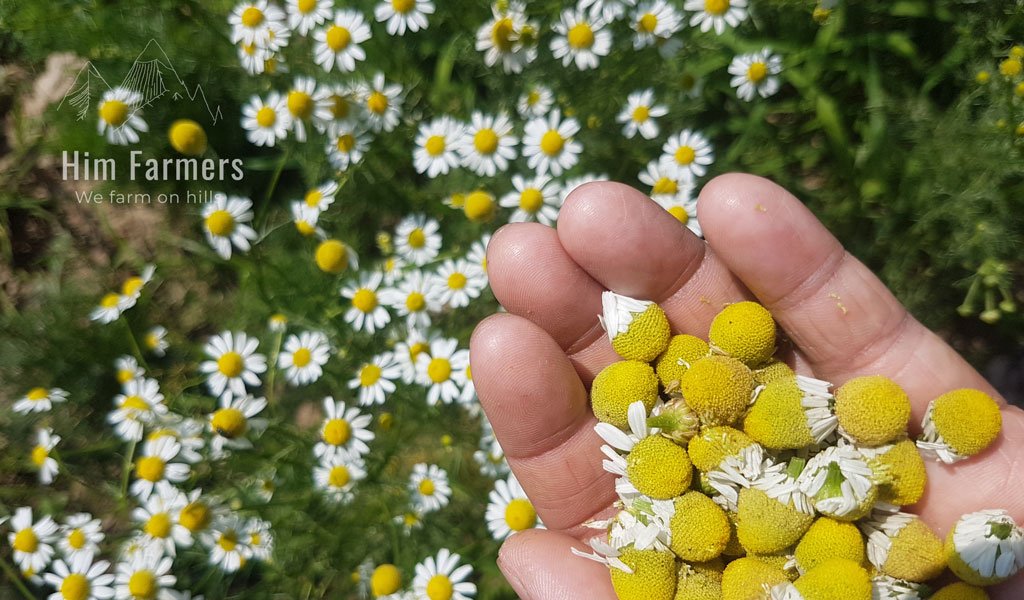
    Dry Chamomile Flowers :
    Snipped flowers should be kept away from sun light and dust. Keep them indoor and make sure the area is open free from moist. It might take 2 to 3 weeks to dry them out. You have to wait until the flower easily gets crumbles.

    Storing Dry Chamomile Flowers : 
    Keep them in a air-tight container away from moisture and sun light. We use mason jars to store them.

    Collecting Chamomile Flowers
    Chamomile Flower ready for Harvesting
    Play Video
    Mature Chamomile Crop
    Play Video
    First set of dry chamomile flowers
    Play Video

    STEP 7 : Usage of dry chamomile flowers

    There are different ways you can utilize chamomile but the easiest is to consume it as a tea. You can directly use chamomile flowers dry or fresh to prepare for your tea. Its better to dry out the flowers and store them in a container to keep them sustained for a longer period of time.

    Conclusion

    We have felt the need of this guidance especially for the people who are starting with the cultivation of chamomile flowers. We initially struggled because we didn’t find any such practical guidance available. Had it been there, we could have saved plenty of time and money on the production of chamomile flowers.

    Hope it would be helpful for you. If you are looking for more such practical guidance, please don’t forget to subscribe for more posts here
    Please share your comments below, we would love to hear!

    If you are looking to buy chamomile flowers at wholesale rate, you can contact us here. The minimum quantity required for wholesale price would be 10kg.

    +2

    Leave a Comment

    Your email address will not be published. Required fields are marked *

    Price Based Country test mode enabled for testing India. You should do tests on private browsing mode. Browse in private with Firefox, Chrome and Safari